|
||||
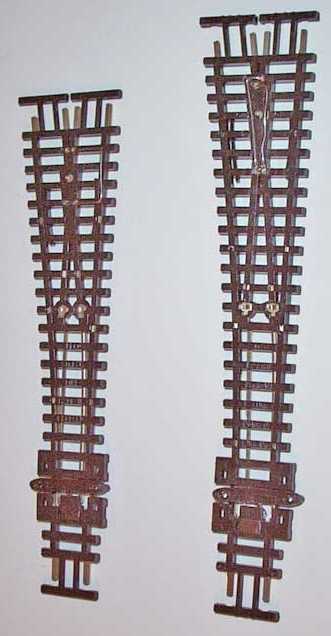
Peco Turnouts
Insulfrog or Electrofrog; Which Should I Use? Note: Peco is slowly phasing out their Insulfrog and Electrofrog turnouts as the old molds wear out. They are being replaced with their Unifrog. See Unifrog below. We get this question a lot on the Q&A Forum. Anyone asking this question will get as many answers that say use Insulfrogs and just as many that say use Electrofrogs. In the end, the person may regret they even asked the question. If you do ask this question, be sure to follow the answers that are technically based rather than those based on luck. The size of your layout has no bearing on which you use. Modelers often refer to Insulfrogs and Electrofrogs when talking about other turnouts. I'm sure Peco would appreciate that you note that these are names that they give to two of their product lines and probably shouldn't be used when refering to other manufacturers products. I will only use these terms when refering to Peco products. I should also mention that Peco has a relatively new product they call Unifrog. It is a hybrid of an Insulfrog and Electrofrog. I have examined one and it is discussed below. They are not producing them across their entire product line; at least not yet. Have no fear, the Insulfrog and Electrofrogs, both discussed below in this website, are perfectly good products. Continue to use them until, if and when, the Unfrog product line is expanded. Here's some considerations on the Insulfrog and Electrofrog: Insulfrog The Insulfrog has one less wire to hook up - the frog wire. Because some people perceive the Insulfrog to be a lot easier to hook up than the Electrofrog, they choose to use an Insulfrog. But beware of people who say that they use in the Insulfrog and have no problems with it. That may be true for them, but may not be true for you. Locomotives that have short wheel bases, few wheels picking up power (like many steam locomotives), no flywheels, or operated slowly, may stall out on an Insulfrog. This has led some people/clubs to replace Insulfrogs with Electrofrogs. This is a time consuming and expensive lesson learned the hard way. Lots of people do use Insulfrogs successfully. Could you be one of them? Buy the largest size Insulfrog you want to use. Set up a test track and test all your locomotives at the speed you intend to run them. If all goes well, you might be able to use an Insulfrog. I just caution you if you buy a new locomotive or if people will bring their locomotives with them. These may not work. Another thing you can try is buy Electrofrogs, but don't hook up the frog wire. See how things go. Just be aware that an unwired Electrofrog is a little longer than the dead area of an Insulfrog. If you go this route, attach a wire to the frog wire when you install the turnout to make it easier to hook up later. See below for wiring up an Insulfrog. Electrofrog The Electrofrog is always a good choice. As one person put it, you will never regret using it. It works at all speeds and with all locomotives. It is that simple. The Electrofrog isn't that much harder than an Insulfrog to hook up. There is no need to be afraid of it. If you are using Tortoises or another switch machine with built in contacts, the cost of hooking up the frog is 20 inches of wire. You probably don't know which way to hook up the Tortoise to your track bus. No problem. Just hook it up temporarilty and try it out. If you have it wrong, swap the track bus connection wires before hooking it up permanently. Or install it and don't hook up the frog wire until you are sure you need it. Just drop it through your benchwork and attach a short wire to it so that it is easier to wire later if you choose to. See below for wiring up an Electrofrog,
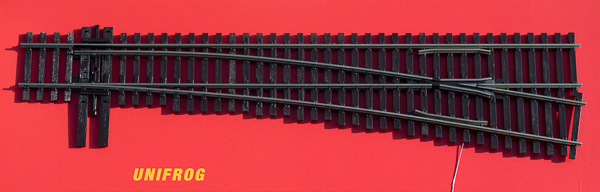
The Unifrog has a "U" in its part number. The Peco Unifrog is the newest addition to the Peco line of turnouts. As development has progressed some minor changes have been made to make this a great turnout.
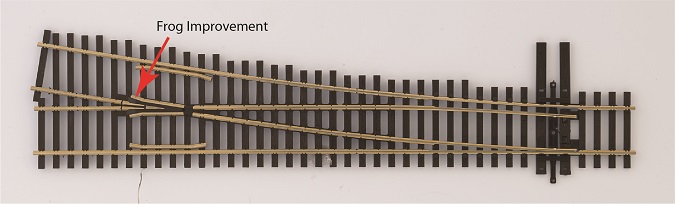
Image used with persmission of Kalmbach Publishing. Code 70 Unifrog is the latest addition to the line of Unifrogs. Two changes have been made that make the Unifrog even better. These changes are being applied to the new code 83 version of the Unifrog. Compare the frog of the code 70 with the code 83 below. This change should make metal wheels less likely to short on the frog.
Image used with persmission of Kalmbach Publishing. Also, the two wires that connect the closure rails to the frog rails have been relocated so that the wire for the frog won't short to them. This is on the back of the turnout. This also should be a change welcomed by Peco fans.
N-Scale Peco Unifrog
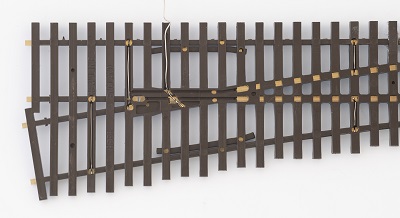
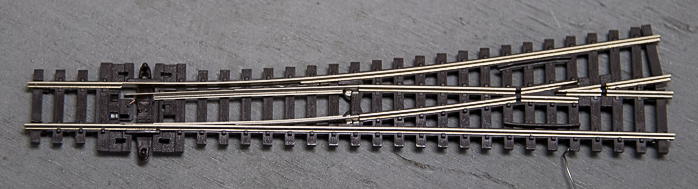
Initial, HO-Scale, Code 83 Peco Unifrog (now updated like the Code 70 version) What is the Unifrog? The Unifrog has a small, electrically isolated frog that can be power routed. The frog is about the size of the Peco Insulfrog. This means that you possibly could avoid power routing the turnout and use it like an Insulfrog. Or you can power route it like the Peco Electrofrog. The Unifrog appears to be a mix of the best between the Insulfrog and Electrofrog. One could expect that Peco may intend to discontinue the Insulfrog and Electrofrog and only offer the Unifrog. Modelers who didn't want to power route their turnouts gambled by installing Insulfrogs and hoped everything would work. Now that gamble isn't such a big risk. All you have to do is drop the supplied frog wire through a hole in your benchwork and roll your dice. If you find your locomotives don't like the isolated frog, you can easily hook up the frog wire and now use your turnout with a power routed frog. Before I go further, if you currently have Electrofrogs or are wondering if you should wait until Peco expands their Unifrog product line, relax. I'm about to build a new layout with Pecos myself. The Unifrog has a few nice features over the Electrofrog, but it doesn't render them an obsolete choice. Go ahead and use any Electrofrogs you have on hand. Feel free to buy more if you need to while you wait for Unifrogs. I describe how to wire Electrofrogs below. With the Electrofrog, you needed to use two insulated joiners on the frog rails to prevent downstream DCC tracks from shorting out. The Unifrog is like the Insulfrog. The frog rails are not tied to the frog and don't change polarity with the frog. So no insulated joiners are needed with the Unifrog. With the Electrofrog, you had the option of power routing the the closure rails and frog with the flipping of the point rails. You don't have that option with the Unifrog. Don't worry, if you are new to DCC, this was an option you don't need. So there is nothing to snip as was the case with the Electrofrog. As a bonus to not having the power routing rails option, Peco has already attached the closure rails to the stock rails. These are four solder connections you don't have to make! The only solder connections you need to make to the turnout itself is to the stock rails. Peco has already connected a wire to the frog for you. The blue frog rail is tied directly to the blue stock rail. You will note a jumper around the frog for the rails I show in red. This connects the red frog, closure, and stock rail together. This is an electrically acceptable thing to do. If there is anything with the Unifrog that MIGHT cause some concern, it is how close the two closure rails come to each other near the frog. The N-scalers in our club tell me that they have had turnouts like this before and never had a problem. I'll give Peco the benefit of the doubt and won't worry either. If you do have shorts at the frog, some fingernail polish on the inside edge of the rail at this point should solve the problem. You have the option of power routing your frog or leaving it disconnected. Small wheel base locomotives or those that only have a few wheels picking up power, may have problem with this. If you are a gambler, leave it disconnected and see if you have problems. Even if you elect to leave it disconnected for now, I suggest you attach a wire about 6" to 12" inches (150-30mm) long now and drop this through a hole in your benchwork. Should you find that you need to power route your frog later, you will have something to attach to. Otherwise, you will find yourself under your layout trying to solder to a very short wire above your head. You will hate yourself later if you don't attach a wire to it now! As a bonus to N-scale modelers, Ken Klipple, who provided the turnout for my examination, made some mechanical measurements on the turnout. Since I have no experience in knowing how close they need to be perfect to be good, I simply provide them for you to make your own judgement. Click here for the zip file containing the xlsx and ods files.
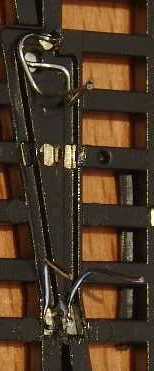
Note: The HO #6 Unifrogs don't have hinges on the points. This is a great improvement! How to Wire This Turnout: This section assumes you have read "How to Wire Turnouts" in the section on turnouts. 1. Run a wire from each stock rail to the corresponding bus wire as shown in color above. 2. For the N-scale turnout, you have the option to jumper the hinge point between the closure rails and point rails. If you do this, a very small wire, like a #28 or #30 AWG wire is suggested. Be careful and don't interfere with the flipping of the points. As I said, this is an optional step. In N-scale, attached this wire would be difficult and probably should only be attempted by modelers who consider themselves to be expert solderers. For HO, there are no hinge points. You don't have to worry about wiring around the hinge. 3. If you want to power route your frog, attach the frog wire (shown in green) to the output of a Frog Juicer, a Tortoise, a manual switch, or any other device you have for controlling your frog polarity. See the section on "How to Wire Turnouts" for ideas on doing this. Note: You do not need to use insulated joiners anywhere on this turnout. A Note for Everyone About the Unifrog Frog Wire The Unifrog comes with a wire that allows you power the frog. Even if you don't intend to the power the frog, you need to make sure this wire doesn't short to the other wires on the bottom of the turnout. If you are powering your frog, don't bend the wire straight down like I initially did. It may touch the other wires on the bottom of the turnout. Ask me how I know. Peco provided a little grove on the bottom of the turnout tie so that you can come away from the frog and then bend the wire straight down. As a little insurance, I put a dab of Walthers Goo in the grove to hold the wire. At least look it over and make sure you didn't accidentally touch the other wires. Because I don't like to fail, I check the frog wire with an ohmmeter. This is not a design defect. If you use the little grove like Peco intended, you will be fine. I was just accustomed to what I was doing with my Electrofrogs.
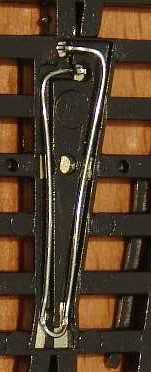
Frog wire going to right. It is in the grove that Peco provided. I added some Walthers Goo to hold the wire in the grove and keep it from touching the wires that are close to the frog.
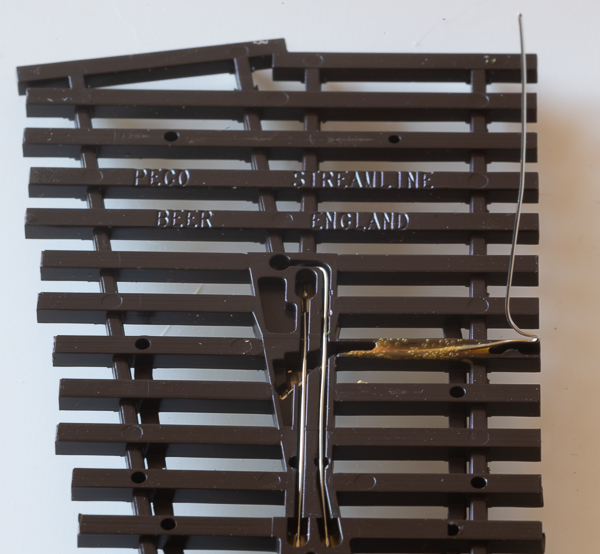
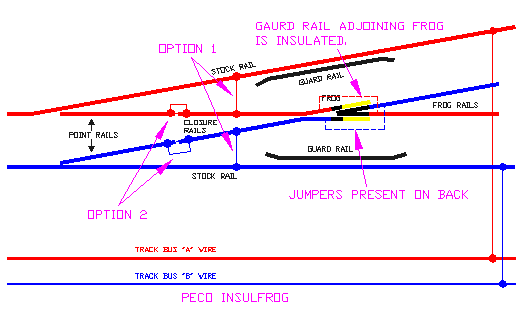
SUGGESTION #2-12a: Peco "Insulfrog" Turnout Is DCC Friendly As Is. Code 75, 83, 100
The Insulfrog is DCC ready as is. The insulated part of the frog is much smaller than the frog on an Atlas turnout. So you have a better chance of an 0-4-0 making it across this frog without a problem and without power routing the frog. Note though that all four wheels of the 0-4-0 must pick up track power which is commonly the case. You cannot power route the frog of this switch. If you wanted to power route the frog of a switch, you would not purchase this switch. Note also that the metal guard rail portions of the frog are not powered at all and therefore would not cause a short should a train derail on the frog. Option 1: Peco provides a place for you to install these jumpers. Installing them would better able enable a short to allow your booster to shut itself down. They would also help prevent the jumpers Peco provided on the back across the frog from becoming hot spots and melting the frog. Option 2: Place these across the hinge of the points. These would help prevent the points from having poor electrical contact years down the road. How to Wire This Turnout: This section assumes you have read "How to Wire Turnouts" in the section on turnouts. 1. Run a wire from each point rail to the corresponding bus wire as shown in color above. 2. Run a wire from each stock rail to the corresponding bus wire as shown in color above. Note: You do not need to use insulated joiners anywhere on this turnout.
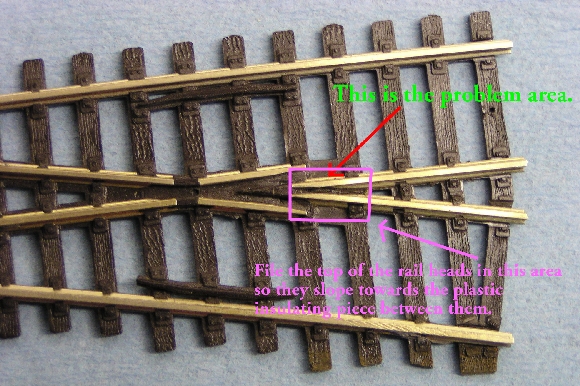
SUGGESTION: Solving Shorts in a Peco "Insulfrog" Turnout The following was contributed by Dale Gloer, dale.gloer@telus.net
File the top of the rail heads in the area so they slope towards the plastic insulating piece between them. I have indicated the trouble area with an arrow. As you can see (although the very point of the frog is hard to make out) the point of the frog is plastic and the plastic extends as an insulator between the 2 frog rails. On this particular switch the spacing between the rails is fairly wide and it is unlikely this switch would cause problems. But on some the rails are closer together so that the insulating piece is also narrow and it is possible for a wheel tread to bridge the two rails. It is very easy to determine if the problem is caused by a wheel tread bridging the two rails. Just cover the rails in that narrow area with a piece of scotch tape. For a permanent fix I use a file and bevel the 2 rail heads so that the rail heads slope down toward the plastic insulator. It doesn't take much to fix the problem. I know others who paint the rails with clear lacquer, even leaving a piece of scotch tape on the rails is a fairly durable solution. I ran that way quite a while before I tried filing the rail heads, in fact I've got one now with tape on it.
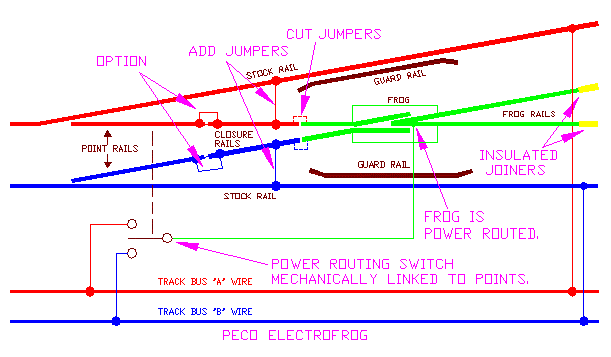
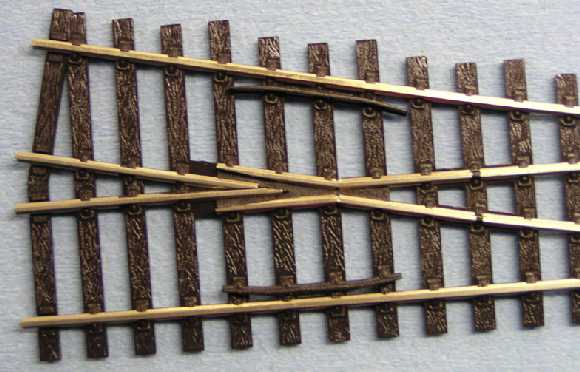
SUGGESTION #2-12b: Peco "Electrofrog" Turnout Is DCC Friendly In Just a Few Snips. The Peco "Electrofrog" has an "E" in it's part number. Peco electrofrogs come in several variants depending
on the scale of the turnout and the angle of the turnout. I'd have
to buy one of every turnout to be sure I have everything right. If
you find that I have categorized your favorite turnout incorrectly,
please do two things: Code 75, 83, 100: The Peco turnout is a clever design. It can be a typical power routed turnout or a DCC friendly one. It is proof positive that manufacturers can make turnouts that suit all modelers' needs without it costing more to make them. Let this be a public thank you on behalf of all model railroaders for a company responding to the needs of those who buy your product - by choice and because modelers like it, not because it is the least evil on the market. This is a great improvement. The problem with the frog shorting is completely eliminated with no serious cutting effort on the part of the modeler required. Not only does the modeler no longer need to saw the turnout, potentially risking damage, but also the jumpers around the frog do not need to be cut. The only jumpers that need to be cut are those shown. Be careful not to cut those across the frog! You have less problem of a dead frog with this arrangement. Furthermore, the desire to use a light bulb is drastically reduced. So that you don't have to solder to the frog, powering the frog is now provided by some wires. Congratulations Peco!
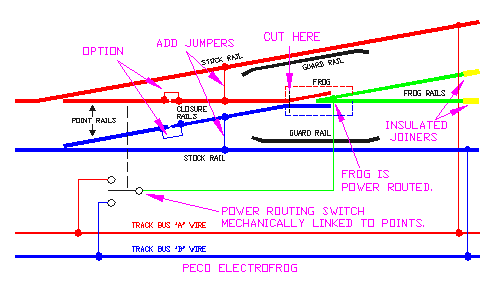
How do you know you have this type of turnout? It sounds like the wires coming out the side would be a fast and obvious indication. Furthermore, you should notice breaks in the turnout, indicated at the "CUT JUMPERS" point not present in the turnout I show above. And of course, the turnout I show above does not have the jumpers to be cut! How to Wire This Turnout: This section assumes you have read "How to Wire Turnouts" in the section on turnouts. 1. Remove jumpers from back of frog as shown. 2. Add jumper between stock rails and closure rails as shown. Or, for less solder joints to your track, drop feeders from each closure rail to your buses as shown in color above. 3. Connect the frog to your power routing switch or switch machine. 4. Connect your power routing switch or switch machine to your bus as shown in the above drawing. If the locomotive shorts when it goes across the frog, swap the wires that connect your power routing switch or switch machine to your bus. 5. Install insulated joiners as shown. 6. Run a wire from each point rail to the corresponding bus wire as shown in color above. 7. Run a wire from each stock rail to the corresponding bus wire as shown in color above.
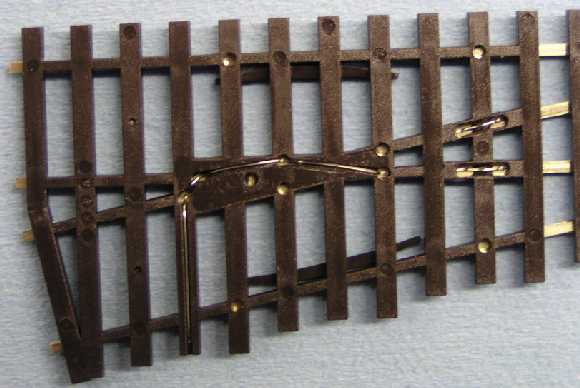
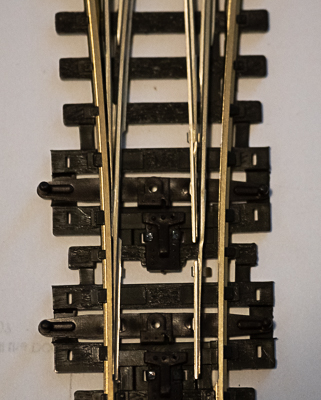
Electrofrog - Top View
Electrofrog - Underneath View Unmodified
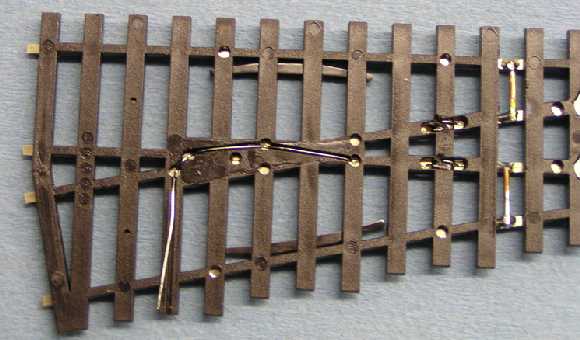
Electrofrog - Underneath View
SUGGESTION #2-12c: Code 55 and Older Turnouts Code 55, (75, 100 older): This applies to the current code 55 turnouts and may apply to some of the older code 75 and 100 turnouts.
Option: I also suggest that you solder jumpers (called bonds) from each closure rail to the corresponding point rail to ensure life-long good electrical contact and avoid a potential hot spot. Better yet, drop feeders from the point rails to the bus. Bonds sometimes make the turnout too stiff for some switchmachines. You will need to use insulated joiners on the ends of the frog rails and will need to power route the frog as shown. If you stop here, you will have a potential short situation at the frog should a train derail. I suggest that you spend another 30 seconds and cut the frog as shown. This will electrically insulate the guard rails from the frog. After you isolate the frog, you will need to power the closure rails. On some Peco turnouts, Peco has left a gap in the plastic ties to allow you to easily add jumpers shown in the drawing as "ADD JUMPERS." Such gaps can be seen in the photo of the code 75, 83, and 100 turnouts. As you can see in the photo of the code 55 turnouts, they have not provided anywhere for you to do this. You can either install the jumpers by cutting the plastic with a sharp knife, or you can add feeders that connect between your closure rails and your bus under the layout. This actually results in two less solder joints on your turnout. You will, of course, still need two feeders from your stock rails. With this type of turnout, I suggest you use the light bulb to reduce the likelihood of your system's shut down due to a derailment on the frog. Also, the light bulb protects against a short due to someone coming into the switch when the points are not thrown in their direction. If you do not cut the frog as shown, then I definitely recommend you use the light bulb. Without the bulb, a derailment on the frog will definitely cause a short. See the track wiring section for more information on using light bulbs. How to Wire This Turnout: This section assumes you have read "How to Wire Turnouts" in the section on turnouts. 1. Remove jumpers from back of frog as shown. 2. Add jumper between stock rails and closure rails as shown. Or, for less solder joints to your track, drop feeders from each closure rail to your buses as shown in color above. 3. Connect the frog to your power routing switch or switch machine. 4. Connect your power routing switch or switch machine to your bus as shown in the above drawing. If the locomotive shorts when it goes across the frog, swap the wires that connect your power routing switch or switch machine to your bus. 5. Install insulated joiners as shown. 6. Run a wire from each point rail to the corresponding bus wire as shown in color above. 7. Run a wire from each stock rail to the corresponding bus wire as shown in color above.
SUGGESTION #2-12d: Connecting Feeders to a Peco Electrofrog Turnout: by Charles Steadman Charles wrote this regarding the code 55 Peco for N-scale. It should work on other sizes of Peco turnouts as well.
They have a neat little wire that runs from one frog rail around the far side to the opposite closure rail, then to the next closure rail, and back to the other side of the frog. This seems a bit pointless initially, as the frog rails themselves are electrically connected internally (even though they appear to have a very thin insulating plastic piece at the frog point). But it makes it spectacularly easy to convert, without any need to solder wire to any rail. A picture is in order. Or rather, two. The first (attached) picture shows both sides of the turnout "out of the box". The second picture shows how I butchered it. By cutting the tiny loop between the closure rails, and then cutting both connecting wires halfway along their length (using wire cutters or a dremel), you end up with four "feeders" pointing down. Two of these feeders come from the frog rails, which can be soldered together and connected to the output of the tortoise (or DPDT or whatever you want to use), and the other pair (one from each of the closure rails) can be run down again to the tortoise or switch, and on to the main bus to feed power to the closure rails and the frog. The stock rails of course pick up their power from somewhere else, or the next bit of track along the line somewhere. Having bent down these closure rail feeders (see 'after' picture), you can now whizz a dremel straight through the pair of frog guard rails (the continuation of the closure rails) in order to insulate them. The feeders are right at the end of the new (shorter) closure rails, and the frog guards are now safe. There's enough plastic support around that going all the way through the rails (you have to, as the picture shows) doesn't significantly affect the support of the rails. Total preparation time -- a few seconds per turnout. The point rails are extremely thin and flexible, and the
force of the throw actually bends them against the stock rails for almost
an inch of their total two inch length. They also have reasonably substantial
hinges to the closure rails. So for now, I haven't dropped feeders from
the point rails for fear of melting something nearby. With code 55 rail,
as you probably know, it's actually code 80 rail half-buried in the
plastic (only 0.055 being visible above the sleepers), so once you start
heating up one of the rails to solder something to it, you can melt
a good number of sleepers quick quickly.
Wiring Double-slip Electrofrog Turnouts for DCC: The following was contributed by Dale Gloer, dale.gloer@telus.net It has essentialy 2 frogs and 4 set of hinged point rails. The point rails are attached in pairs to two throw bars. That is, one throw bar moves 4 points. It requires 2 switch machines. Each frog is wired to the machine that moves the throw bar opposite it. (It is really 2 turnouts overlaid on each other, if you treat it as two turnouts, everything makes sense.) I have 2 Peco code 75 electrofrog double slips. They come with frog power wires attached and require some method of routing frog power, I use a set of contacts on the Tortoise switch machines to do this. Just follow the instruction sheet. The only thing that I did as a mod was to add bond wires across the point hinges. Four of the bonds were easy to install, the other 4 requred a little creativity. Except for adding bonds, which you would do to improve reliability whether DCC or not, Dale is basically saying that you don't need to do anything special to use the Peco Electrofrog Double-slip with DCC. Just follow the instructions that come with the turnout. - Allan
Wiring Peco Electrofrog Crossings This section has been moved to the crossings topic in the Track 2 web page.
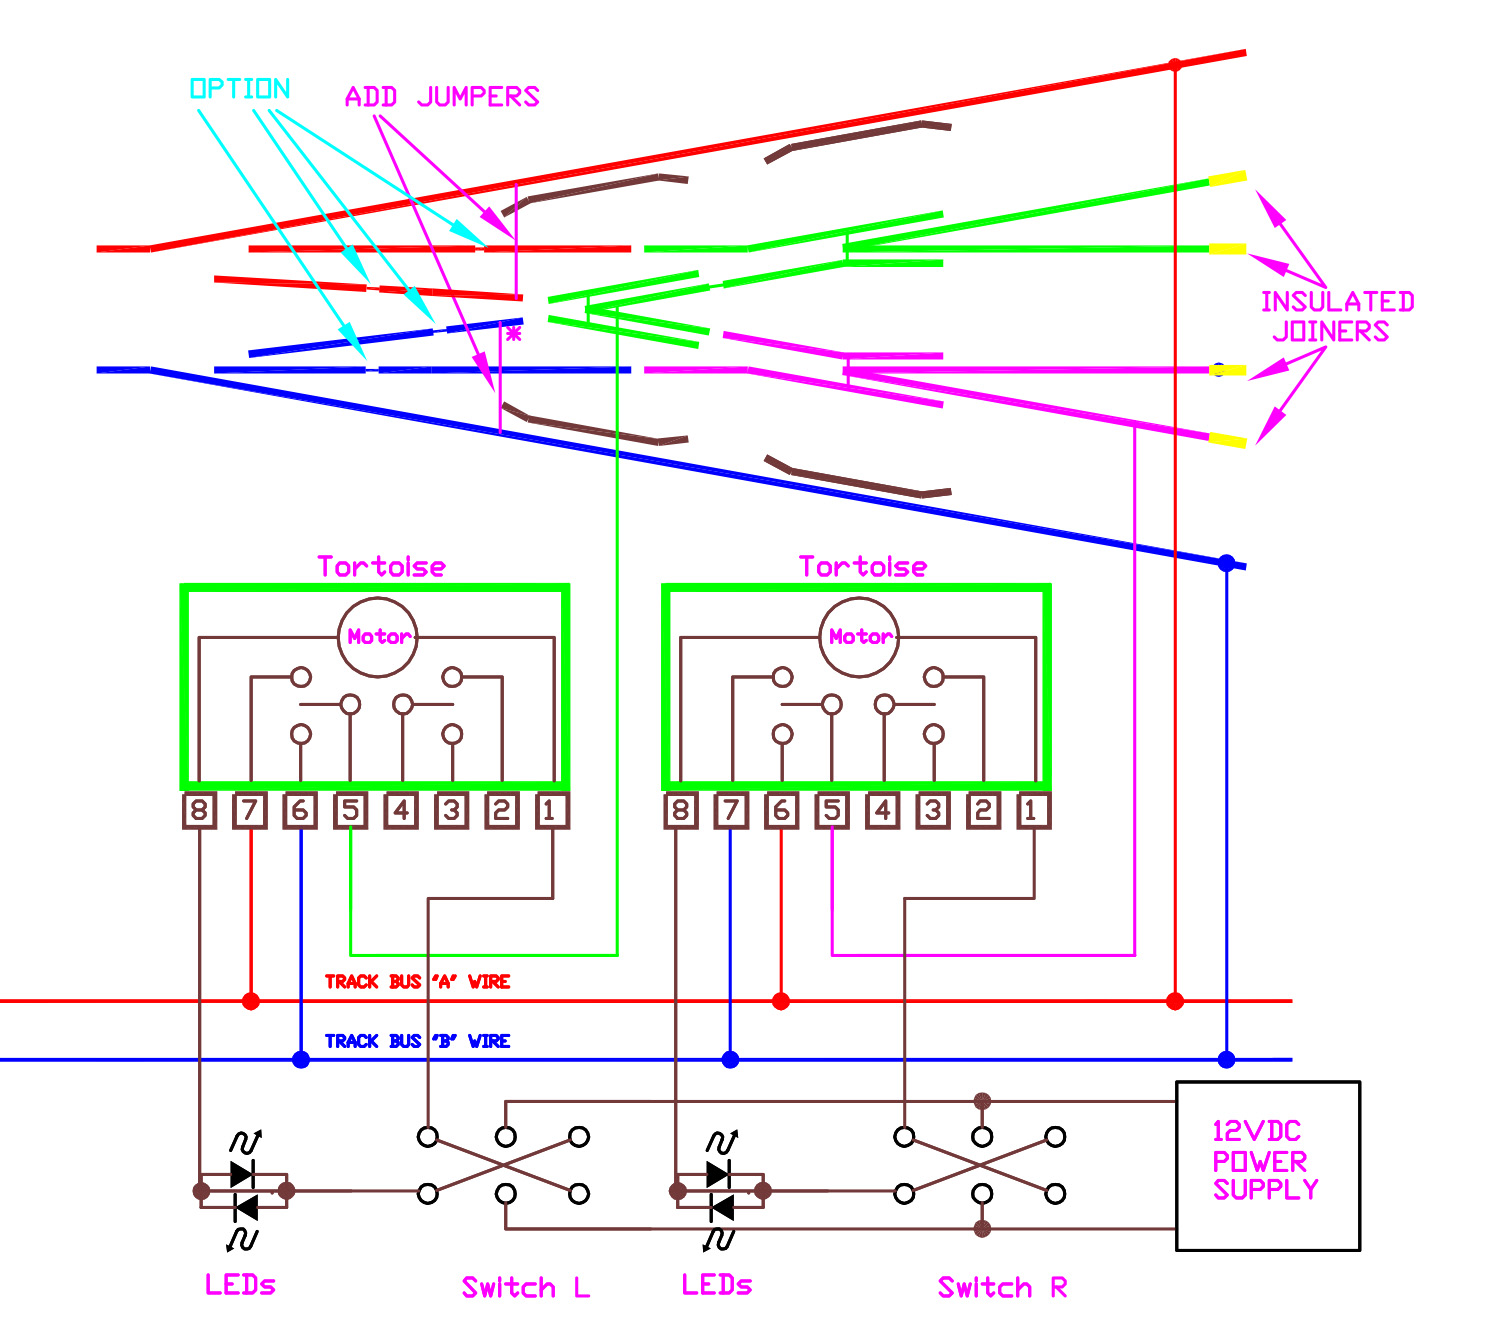
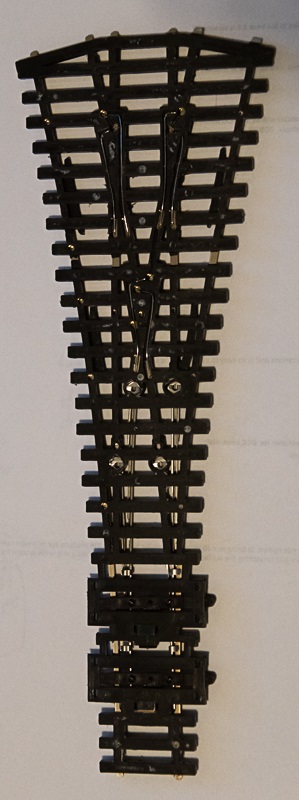
Peco Code 100 Electrofrog and Insulfrog 3-Way Turnouts When I found out that Peco had 3-way turnouts and that they were very compact, I had to check them out. Yes, it is available as an electrofrog and as an insulfrog. Unfortunately, they seem to be only available in code 100 for HO/OO. So if you are a code 83 modeler, you can stop reading now. For track selection indicators for 3-way turnouts, click here. Before diving into the particulars on each turnout, be sure to read the information below that is common to both turnouts. There is a lot to be said for these compact turnouts. For one thing, I don't know what turnout number they are. Peco calls them medium. They appear to be about a #6. They appear to be assembled with Peco's usual high quality and are very solid. A 3-way turnout is a left-hand and a right-hand turnout blended together. Compared to the popular Walthers turnout, these are blended together so tightly, it might take you several minutes of examining them to figure out how they are put together. You are getting two turnouts in about the space of one. Probably because this turnout is available as either an electrofrog or an insulfrog, I wasn't surprised when it appeared they came from similar, if not the same, mold (mould). Both of these turnouts are power routed. Normally, I don't like to depend on power routing through the points. I like to attach wires to the frog rails leaving the turnout. However, after detailed examination of both of these turnouts, I found that the power routing was unavoidable and that you cannot attach wires to the frog rails or else these turnouts will short out. For any turnout, I take an ohm meter and see how the turnout is wired. Peco's wiring is located on the back of the turnout, so you can follow that. Still, I use an ohm meter to avoid missing anything. Peco sells switch machines, but I show wiring diagrams using Tortoises (I like calling them Torti). Peco already provides documentation with the turnouts using their switch machines, so I would be redundant. The Tortoises are very popular, so I thought you might like to see them wired to a Peco turnout. Wire the turnouts as I have shown to the Tortoises, but the Tortoise on the right of the above diagram physically goes underneath the first set of points while the Tortoise on the left goes under the second set of points. Because the throwbars of the two turnouts within the 3-way, your two Tortoises will be very close together and you may find it a little crowded to get the second Tortoise in. Due to the tight proximity of both sets of points, the second set of points cannot be thrown to the right when the second set is thrown to the left. See photo below. So if you plan on throwing the first set of points to the left, make sure the second set of points is thrown to the left first. If you don't heed this warning, your first set of points may not throw completely, if at all.
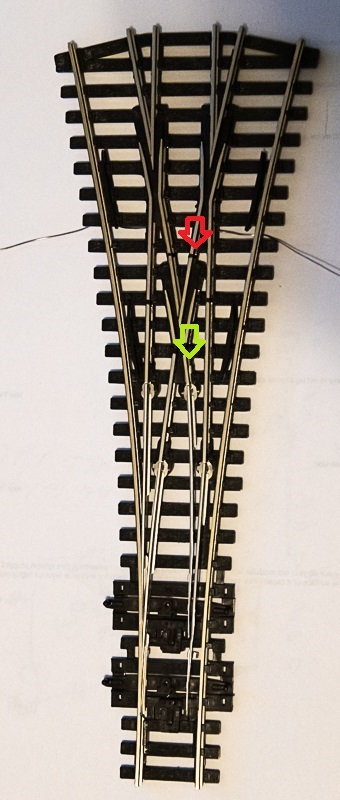
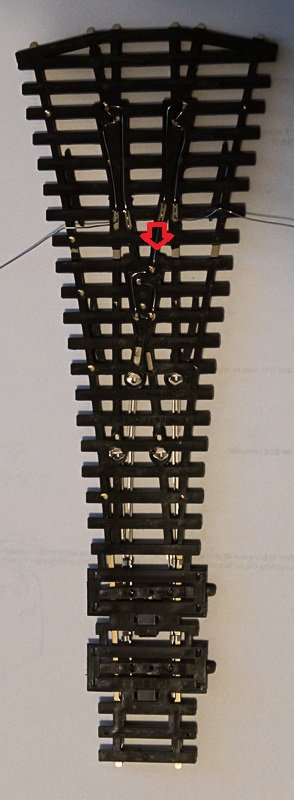
When the first set of points (lower) is thrown to the left, the second set of points (upper) cannot be thrown to the right. I'm told that Peco has a code 75 version that does not have these overlapping points. If you have one that you have not yet installed and would like me to take a look at it, please let me know. Here are descriptions of the electrofrog and the insulfrog turnouts, how to wire them up, and things to look for. Electrofrog, 3-way, code 100: Due to my familarity with the Walther's 3-way turnout, I expected that two of the Peco frogs would be wired together. Examining the back image below (red arrow), you can see that this is the case. Interestingly enough, when you look at the front image below (red arrow), you can see they gapped the rail. The gapping isn't needed and is defeated by the connecion on the back. This gapping or lack thereof, doesn't hurt anything. I only mention it so that you can avoid scratching your head, too.
Peco Code 100 Electrofrog 3-Way Turnout - Top
Peco Code 100 Electrofrog 3-Way Turnout - Bottom
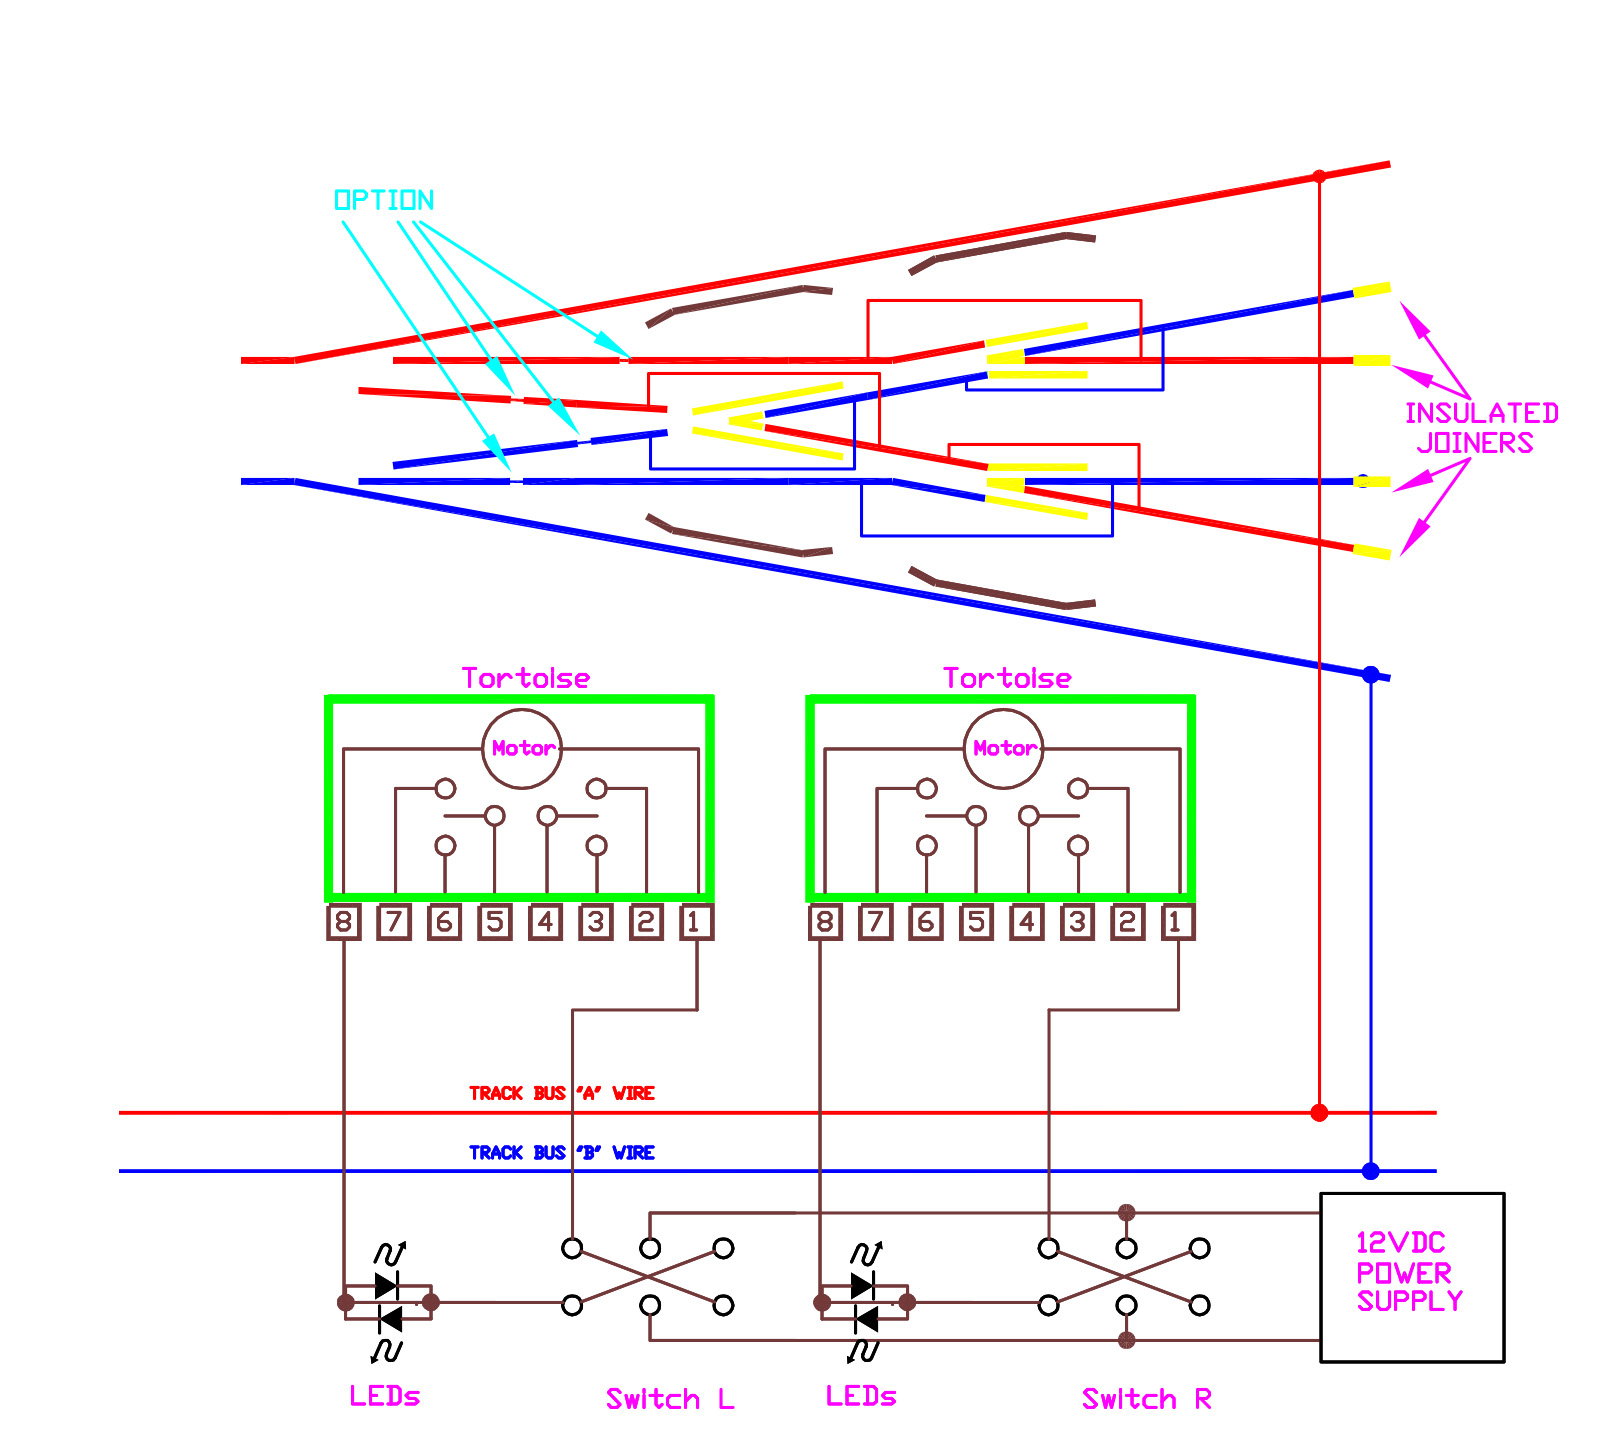
Wiring Diagram for the Peco 3-Way Electrofrog Do not attach wires to the frog rails. Only connect to the red and blue stock rails as shown. Normally, I recommend that you attach jumpers or drop feeders to the closure rails. However, this is a very compact turnout and adding feeders or jumpers would be challenging for many, if not most, modelers. This bit of closure rail is only about a quarter-inch (6mm) long. You risk damaging an expensive turnout. Adding the jumpers (bonds) around the points to the closure rails would also be very difficult to add, so you will probably need to rely on the the power routing of the points. For these reasons, you may want to avoid using this 3-way turnout. Note: Your typical Peco Electrofrog turnout has a couple of jumpers on the back of them that you snip to eliminate the power routing. There are no such jumpers on the 3-way electrofrog turnout. Due to the compactness of this turnout, there is no avoiding power routing. How to Wire The Electrfrog Turnout: This section assumes you have read "How to Wire Turnouts" in the section on turnouts. As complex as these turnout is, wiring it is pretty straight forward. 1. Wire the track bus to the red and blue stock rails as shown. 2. Wire the frogs to their respective switch machines (Tortoises) as shown. Be careful to note that the Tortoise on the right would physically be rotated around with respect to the other Tortoise. They will be "head to head." So note that I have shown the connections to the track bus are reversed to take this change in orientation into account. I suggest that you don't connect the Tortoise wires to the track bus until after you are sure you have the polarity right. 3. Do use the insulated joiners as shown. This will prevent shorts with tracks leaving the turnout which you have wired to your DCC bus. 4. OPTIONAL: If you are a REALLY good solderer, you can add jumpers as shown (ADD JUMPERS). The jumper shown with the asterisk (*) will be particularly difficult and risky to do. Alternately, you can drop feeders to your bus instead of jumpers. If you don't do this, you will be relying on the points to touch the stock rails as Peco intended. But the alternative is ruining an expensive turnout. 5. OPTIONAL: If you are a REALLY good solderer, you can add the jumpers (bonds) shown (OPTION). If you don't do this, you will be relying on the points to touch the stock rails as Peco intended. But the alternative is ruining an expensive turnout. That's all there is to it! Insulfrog, 3-way, code 100:
Peco Code 100 Insulfrog 3-Way Turnout - Top
Peco Code 100 Insulfrog 3-Way Turnout - Bottom
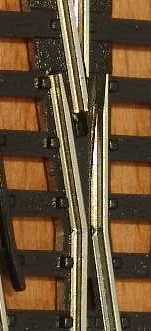
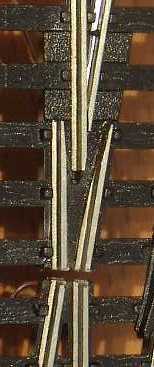
The two rails leaving the frog are very close together. A metal wheel could short the two rails together. This is probably why Peco instructs you to use the insulated joiners on the frog rails.
Wiring Diagram for the Peco 3-Way Insulfrog How to Wire The Insulfrog Turnout: This section assumes you have read "How to Wire Turnouts" in the section on turnouts. As complex as these turnout is, wiring it is pretty straight forward. 1. Wire the track bus to the red and blue stock rails as shown. 2. Do use the insulated joiners as shown. This will prevent shorts with tracks leaving the turnout which you have wired to your DCC bus. 3. OPTIONAL: If you are a REALLY good solderer, you can add the jumpers (bonds) shown (OPTION). If you don't do this, you will be relying on the points to touch the stock rails as Peco intended. But the alternative is ruining an expensive turnout. That's all there is to it!
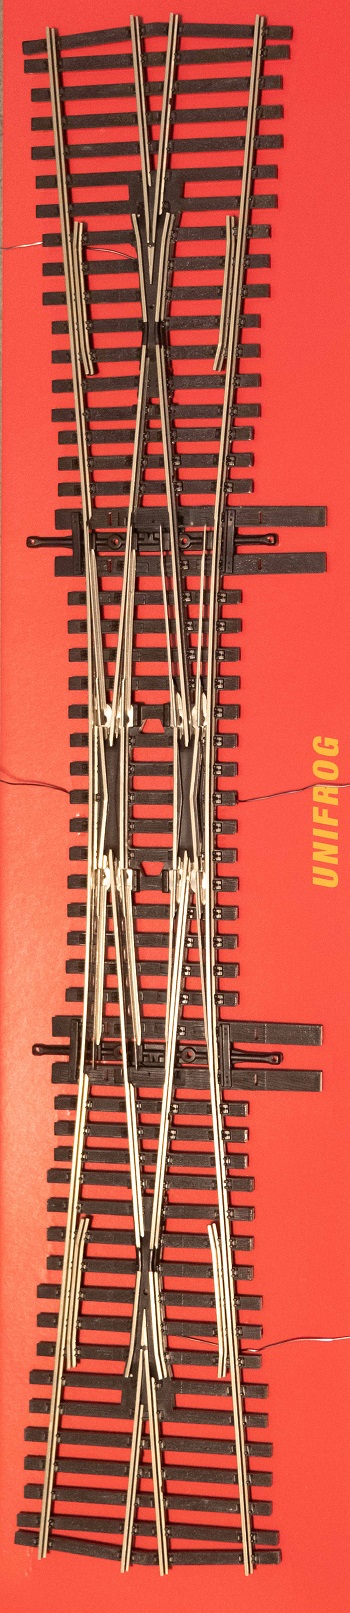
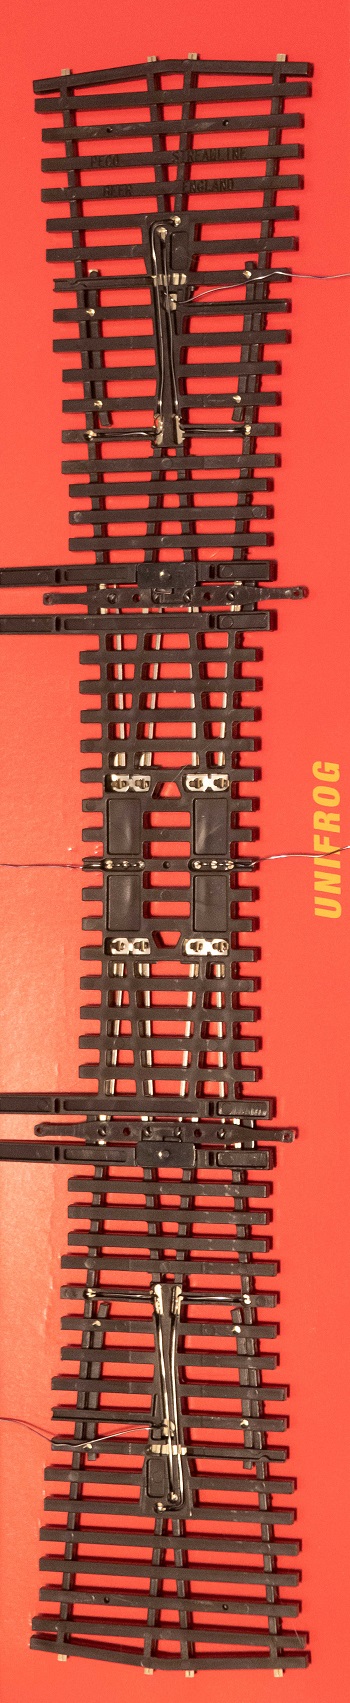
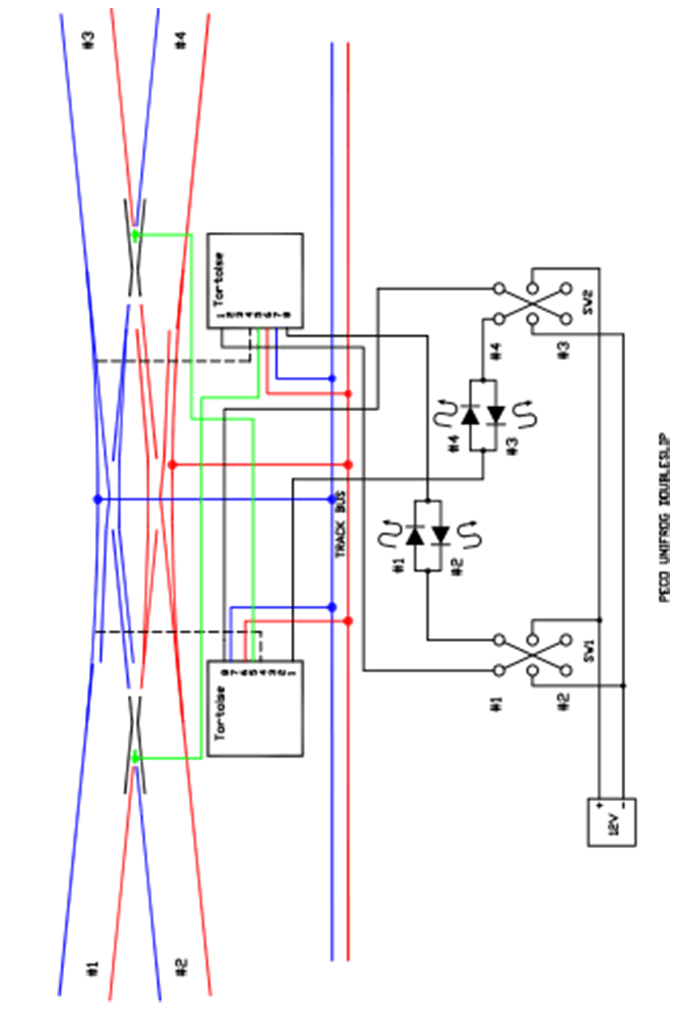
Peco HO Unifrog Double Slip Thanks to Neil Bennett for sending this turnout to me so I could evaluate it. The Unifrog is a Peco turnout that combines the best of their Insulfrog and Electrofrog turnout. Their intention is that you could use it as you would either the Insulfrog or Electrofrog. There are only four wires to hook up and the optional Electrofrog frog is sufficiently small that some modelers could leave it unpowered. Peco has a turnout control system they call the PecoLectrics SmartSwitch system. I hadn't heard of this, so I checked it on the Internet. There is a YouTube video describing the system. It is servo-based and very similar to the Walthers Layout Control System. If you want to use the SmartSwitch system, it is available in the United States from your favorite train hobby supplier. If you like using Tortoise switchmachines, they will work just as well as the SmartSwitch. Given the popularity of the Tortoise, I show the double slip used with them below. As I mentioned, only four wires are needed to be hooked up to use this turnout. I commend Peco for providing pre-wired connections to the stock rails as well as all the intricate connections required for a double slip. No soldering to the turnout rails is required. Peco, if you are listening, please add stock rail connections to your Insulfrog and Electrofrog turnouts. This would be great! Double slips look complicated and they are. But if you stare at it long enough, you will see that a double slip is not much more than two turnouts layed over one another. So you just need two switchmachines and only have two frogs to wire. The most important thing to note is that the frog on one side, say the left, of the turnout is wired to the switchmachine on the right side. The same is true of the frog on right and the switchmachine on the left. A subtle, but essential, thing to note is that the connection to the terminals 6 and 7 of the Tortoise must be made correctly or your locomotive will short out when it hits the frog. This is shown below and in the diagram on the back of the Peco packaging (note the position of their hollow and solid triangles). You can hurt yourself trying to get this right the first time and still get it wrong all depending on how you orient your Tortoise under the turnout. So I recommend that you temporarily connect terminals 6 and 7 with alligator clips and test your turnout thoroughly making sure that a locomotive can run every direction through the turnout without shorting. THEN make the connections to the Tortoise permanent. The temporary alligator clipping won't take any longer than trying to think things through. Let's face it, you will want to test your turnout every which way with a locomotive anyway to make sure you have it right. Alternately, instead of using a Tortoise to power the frog, you could Frog Juicers or similiar products. The Peco instructions show insulators on the ends of the turnout rails. Under normal usage, I didn't see a need to do this. I flipped the points of both turnouts within the double slip and didn't see a problem. BUT if you have two different boosters feeding the through routes of the double slip AND their polarity is reversed, you will need a switch to flip between boosters (Peco identifies them as controllers.) If one of the boosters is set to auto reverse mode or you are using an auto reversing circuit, you won't need the switch Peco shows, but you will need the insulating joiners on the path to the auto reversing circuit or booster.
Peco HO Unifrog Double Slip - top (left) & bottom (right)
How to Wire This Turnout: 1. There are two wires pre-wired to the turnout for the stock rails. Connect them to your bus as shown. 2. There are two wires pre-wired to the frogs. Connect them to the Tortoise on the opposite side of the turnout. 3. Use insulated joiners on the rails leaving the turnout if you will be using two different boosters to power the through routes. |
|
Copyright by Allan Gartner 1996 - 2021 © All rights reserved. You may print this for your own, personal, non-commercial use. Non-commercial, non-personal reproduction may be requested by visiting www.WiringForDCC.com/writeme.htm . All users, commercial and non-commercial, may link only to this site at www.WiringForDCC.com. Thanks to all who contribute to this site and the Q&A forum! |