
|
||||
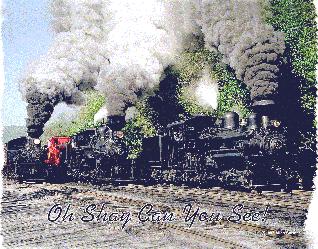
DCC Decoder Installation with Sound into a Bachmann F(G)n3 2-Truck Shay A 4" speaker and throttle sensitive smoke using a Soundtraxx DSD-150 and a Digitrax DG83FX (or newer like the DG380). Bachmann is building their models to 20.3:1; which is correct for narrow gauge on Gauge 1 Track. It has been dubbed Fn3.
A model Shay, a sound system, and DCC - except for the real thing, it doesn't get any better than this! At the end of this installation write-up, I have listed several US locations where I have seen operating Shays. If you are not familar with Shays and bought yours because it looks unique, be sure to read the section also at the end on why Shays really are unique.
Is your Bachmann Shay falling apart or acting so? See note at end of this installation. NOW! TWO VERSIONS OF THESE INSTALLATION INSTRUCTIONS! There are two ways that you can do this installation: 1. Full featured with flickering firebox and speed sensitive smoke. 2. Basic version with sound and all lights. No flickering firebox. When I first did this Shay, I wanted it to be a show piece. So I filled it with features. After several years of having my garden railway on tour, I found no one notices the flickering firebox. Heck, no one notices the headlights! To compound matters, this Shay has very little room inside if you put a quality speaker in the tender. So when I had to put a new decoder in my Shay, I made my life easier and took the flickering firebox effects out. I also removed the voltage regulator board. So if you don't care about smoke or flickering firebox effects, follow the instructions marked "SIMPLIFIED VERSION" and skip those labeled "FULL FEATURED VERSION." If a section has neither label, then it applies to both. Note: If you want a feature from the full featured version, feel free to add it. The schematics were intentionally kept similar. So you can easily add anything you like. FEATURES OF THIS INSTALLATION Model electrical measurements: Locked rotor stall current: >3.2A @12V PER MOTOR. 4.8A @18V PER MOTOR. Regulator regulates to 8.25V. Lamp current=43mA. Smoke Unit=64 ohms 282mA @18V 250mA @16V The features in these installation instructions include: -2 sets of power pick-ups. -2 powered motors. -synchronized chuff. -speed sensitive smoke. -front, rear, and cab DCC controlled, voltage regulated lights. -3" or 4" speaker. -firebox flicker synchronized to brighten when coal is shoveled in. Use Soundtraxx outputs for headlight and reverse. This maximizes the number of Digitrax outputs left free as the Digitrax headlight outputs have greater reprogrammability than the Soundtraxx headlight outputs. There are a variety of ways the DSD can be wired and used. Some of your options involve the F1 and F5 function outputs. I used one of them both for the flickering firebox effect. This is really fantastic. You may want to use one of these lamp circuits for synchronized flickering firebox where the light gets brighter as would be appropriate when the firebox doors are open and the sound effect of coal being shoveled in is generated. For more on the flickering firebox see the section on Using Minature Lamps. The coupler clank activates whenever it's control bit changes state. This often happens when the decoder powers up or is reset, which occurs when the above stall problem takes place. If you don't care for the coupler clank, you can kill it off. If none of your function buttons control the coupler clank, it will never occur. Note! Throttle Up! directional lighting comes on after throttle is advanced for movement. How do the motors work together to drive the pistons? I found out they don't. Close examination of the universal joint forward of the rear truck reveals that it isn't really a universal joint. It contains a slip mechanism so the rear truck doesn't really drive the pistons.
BEFORE YOU START This installation note assumes you have read the section on Sound and the section on Wiring Specific Locomotives. Before I begin, as I talk about right and left, I will always be referring to the side of the locomotive that the pistons are on; whether the locomotive is upside down or not. This is also the engineer's side. Be sure you read the Soundtraxx Owner's Manual - especially if this is your first sound module. The manual contains a lot of good advice. For the person who has done this kind of thing before, it's still worth reading as I learned a few things, too. So after you follow the test procedure, take the time to read the owners manual. You can probably hold off reading the Technical Reference Manual until after you have programmed my CVs and you want to make a change. Digitrax Chief owners: Some Soundtraxx DSD modules will not program on some Chief programming tracks. Make sure you mention you have a Chief when ordering. You will want to get a module that is release 1.1 which is shipping now. Tell them what you want your short address to be and they will program it for you. Otherwise it will be their default 03. All other CVs can be changed in OPS mode on the mainline - which is where you are most likely to program them anyway. Newer Soundtraxx modules allow you to program CV 17 and CV 18, the long address CVs, on the main line in OPS mode. Only CV 1, the short address CV, cannot be programmed in OPS on the main. Don't forget to switch to OPS when you enter programming mode if you will do it on the main. This is similar to trying to operate something without plugging it in first. Who hasn't made that mistake? Also be aware that you cannot read back CVs in OPS mode. Test Your Decoders: It may be several evenings before you get to installing your decoders. Why wait until then to find out any are bad? That would be a real bummer. Test it now. If bad, you can be getting a new one while preparing your locomotive. Be sure to read these directions before starting or buying anything. You have a few choices to make. As you read along, you will find comments that will help you make the necessary decissions. I have placed things in sections to delineate your choices. Ironicly, the wide open design of a Shay that made the real thing easy to work on in the woods, helps make the model a challenge. Where do you hide things? Installing everything will definitely exceed being a one weekend project. Perhaps several unless you dedicate full weekends to the project. If you avoid the 4" speaker, the swinging bell, and go with minimal flickering firebox circuits, it may be possible to do this in one FULL weekend. As with any rolling sound system, installation is a bit more involved than a simple motor and headlights DCC decoder installation. This locomotive can be quite a puzzle in getting dissassembled appropriately. You will want to follow these directions closely to avoid wasted time and frustration. I already made all the mistakes, so as long as you follow these directions, this should be a fairly straight forward project. If you decide to put an option off until later, still read the section on prep work for the option you want to delay. There may be a hole or something that is needed. Doing the prep work up front will make adding the option later easier and faster. The amount of effort required later may so severe that you may say "forget it!" Not putting lamps behind the firebox door now is probably one of those forget it situations. You will notice that two decoders are used. This is primarily because Throttle Up! doesn't have a high current decoder yet. I believe it is on the drawing board, but it won't be out any time soon. I don't know about you, but I hate to waste things, so I will be using the Soundraxx motor output to operate the smoke generator for speed synchronized smoke! Besides, I bet you don't really want to add anything like a transistor or relay to operate the smoke generator. Even the Digitrax decoder doesn't put out enough current on it's function outputs to operate it. Now you can have throttle sensitive smoke if you want it! There are issues concerning the smoke that you have choices over. Those are covered below in the section on hooking up the smoke generator. A note about consisting: If you don't model smaller gauges, the thought of consisting may scare you off. The introductory paragraphs in the Digitrax manual may do likewise. Ignore the manual! Relax! It REALLY is easy! HO and N scale modellers do it all the time! Consisting allows multiple locomotives, or in this case decoders, to operate together. It is also called MU'ing or Multiple Units. When one goes, they all go. Here, you get coordinated movement while maintaining control of individual functions. So you can use the Digitrax decoder to turn on the cab light without getting unwanted sounds from the Soundtraxx decoder. And you can use Soundtraxx decoder without affecting the Digitrax decoder. Lastly, consisting will allowed coordinated smoke activity with locomotive speed! Since I don't consider myself coordinated, this didn't appeal to me. After all, you are probably using your Shay to put on a show. It turned out not to be so bad. The Digitrax decoder is only used to drive the two motors, for the cab light and maybe firebox flicker. Just turn on the firebox and leave it on. You could either just leave the cab light on, too, or select between the two decoders - the advantage here is that you don't need a quick wrist to turn on the cab light. If you had to coordinate it with a whistle or something, it would be a different situation all together - and one I probably could never master! Notes on Programming: Let's talk about programming your sound. You will notice I provided how I programmed my CVs when I was done. You might be tempted to go ahead and program my suggested values. Hold your ironhorses. Right out the box, this decoder makes every sound it can, at full volume, and begins as soon as track power is applied. Your spouse may not believe it, but this good. I suspect that if this decoder can make even one sound, it can make them all. Still, you will have a reassuring feeling that everything is working if every sound is being produced. Every time you put the locomotive on the track it will start talking to you. This is far better for your peace of mind than, "Oh no, what have I done? :((" If you program all the CVs up front and make a mistake, you won't know if you did something wrong or the module is bad. Programming my CVs turns down the volume and makes several of the automatic functions manual. As soon as you have confidence in your new module, or your spouse threatens you, program CV50 to 04. This will turn the volume down to an enjoyable level - by you, if not the entire household. Also program CV42 to 80h - which is 80 on a Digitrax throttle. It may be 128 on some throttles. This uses the F8 key to mute the module. These features should restore domestic harmony. Reading between the domestic jokes, you should note that their 1 watt amplifier can produce adequate volume with no problem. You may also want to program CV53 to 01 - wait for address packet. This means that except for hiss. your locomotive will be silent until you send it a command - like advancing the throttle, before it will do more than hiss. Just in case you think you really screwed up the programming, read about CV30 in the manuals. You can reset the decoder to the manufacturer's defaults - including preprogrammed addresses provided for Chief owners. Do program the addresses you want each decoder to have before you install the two decoders into the locomotive. If you install them both with their default address of 03, you will not be able to communicate with them independently after installation. Now is a good time to do this.
HANDLING YOUR LOCOMOTIVE Murphy's Law usually ensures that I damage something. As gentle as I tried to be with my new Shay that I waitted five years for Bachmann to produce, I managed to damage a few things. This is a well built locomotive, but it is heavy too. If it slips out of your hand, something may end up pulling tight on a wire and breaking something. Always handle by frame and running boards when turning locomotive over. Also keep away from non-train oriented relatives. They are not aware that this plastic-sheathed model is full of metal and TOP heavy. Perhaps install one of those people sensitive car alarm systems that says, "STAND BACK! PROTECTED BY VIPER!" You are in luck, because I'm the one who had all the bad luck. DO work on your Shay on foam as suggested. But use a piece of foam that is at least 20" wide and keep the Shay AT LEAST 10" from the edge. If you are going to sneeze, lay the Shay down FIRST! Due to it's top heaviness, the Shay is not stable standing up on the foam. I can't emphasize not to overtighten. In fact, stop short of tightening! These trucks are EASY to strip. I have stripped many of the holes throughout the Shay. It doesn't seem possible that you can be careful enough. It is probably better to stop when you think the screw is flush and then see if the part wiggles at all. Snug seems to be too tight. I am very concerned with the truck cover plate screws which must be removed for routine lubrication. I hope Bachmann looks at this in their next model. Hopefully, it's just because I am a klutz! |
| Part # | Price | Description | Usage |
| 272-1098 | 6V, 60mA Grain of Wheat Bulbs 1 red, yellow, & green w/leads | Flickering Firebox | |
| 272-1099 | $1.29 | 12V, 60mA Grain of Wheat Bulbs 1 red, yellow, & green w/leads | Flickering Firebox w/Digitrax or O/G only. Requires decoders that can adjust brightness of effects. If you use two of the 272-1098 in series above, you will never go wrong. |
| 271-151 | $.49/2 | 10 ohm 1 watt resistor | Digitrax now recommends this lower value resistor for reliable programming feedback of their DS-54s. |
| 271-1103 | $.49/5 | 22 ohm 1/2 watt resistor | Surge limiting on FX functions like flickering firebox, Mars lights, ditch lights, beacons, strobes, etc. |
| 271-1104 | $.49/5 | 33 ohm 1/2 watt resistor | Surge limiting on FX functions like flickering firebox, Mars lights, ditch lights, beacons, strobes, etc. |
| 271-1105 | $.49/5 | 47 ohm 1/2 watt resistor | |
| 271-1108 | $.49/5 | 100 ohm 1/2 watt resistor | |
| 271-1111 | $.49/5 | 220 ohm 1/2 watt resistor | |
| 271-1113 | $.49/5 | 330 ohm 1/2 watt resistor | |
| 271-1116 | $.49/5 | 560 ohm 1/2 watt resistor | |
| 271-1119 | $.49/5 | 1.2k ohm 1/2 watt resistor | |
| 275-241 | $2.99 | "Micromini" 12VDC relay, SPDT, 1A | Useful for controlling things like smoke generators with decoders. |
| 40-1197 | $11.99 | 4" Full range speaker | G scale speaker. |
| 278-1610 | Colored heat-shrink tubing assortment. | ||
| 278-1627B | Heat shrink assortment, black. | ||
![]()
FULL FEATURED VERSION:
INSTALLING THE SYNCHRONIZED FLICKERING FIREBOX LIGHTS:
Even after you have gotten into the firebox, you STILL can't remove the existing firebox lights! No matter, you CAN slide them down enough to add the synchronized flickering lights.
Slide them into a piece of heatshrink and blacken the white leads with a black marker pen or liquid electrical tape. Slide wires into the open firebox door and get the wires to go down between the silvered firebox and circuit board.
82 ohm for flickering firebox.
![]()
SPEAKER PREP
4 inch speaker
4"Speaker - Get speaker to fit before wiring and replacing rear truck. Cut as shown. Bolt speaker down on right side 2 places. To replace wiring cover on bottom of Shay, you will need to drill a hole in the speaker frame.
Use liquid nails to glue in weight. Remove all internal tender features. Don't damage crank gizmo in corner. The tender sides are not straight up and neither are the sides to the lead weight. Make sure weight is right side up before attempting to glue in place. It will not fit upside down.
Since the original tender mounting was removed for the 4" speaker, you will need to drill a hole in the lead weight on the engineer's (right) side.
Drill a hole through the bottom of the locomotive. Drill enough into the lead to leave a mark. Then take the tender off and finishing drilling into the lead as described below.
As I found out the hard way, drilling lead requires a bit of technique. This is because the lead heats up and apparently partially melts as your drill. The shavings come out of the hole were they cool and fuse together seizing tightly around the drill bit causing it to snap.
For starters, don't use a self tapping or sheet metal screw that is any longer than 5/8" (16mm). This will minimize the depth you will have to be drilling.
Drilling lead is easier than some hardwoods. So don't apply much pressure when drilling. Don't let the bit bite into the lead and pull itself in.
If using a variable speed drill, keep it going at a relatively high speed. If the drill sounds like it is binding, speed up, not down. Speeding up keeps it hot. Slowing down allows the lead to cool and the bit to become stuck. Unlike wood, cooling lead will fill in the bit's spiral grasping it tightly.
Keep pulling the bit out and getting the hole clear. Stop if necessary and use a large bit to clear the lead that is accumulating around the hole's openning. If your patient (I'm not), let the lead cool down so that it doesn't get close to the melting point.
 Make sure you
clean up ALL the lead. This includes the lead particles as well
as the lead that has smeared onto surfaces. Clean your hands thoroughly
when done. Dispose of lead where children, neighbor's children, and
animals cannot get to it. Lead is hazardous to your health.
Make sure you
clean up ALL the lead. This includes the lead particles as well
as the lead that has smeared onto surfaces. Clean your hands thoroughly
when done. Dispose of lead where children, neighbor's children, and
animals cannot get to it. Lead is hazardous to your health.
It will be easier to tap the hole with a screw that has a hex head on it. Then go ahead and use a less obvious rounded head screw.
![]()
GENERAL PREP
Make the hole where the wires enter the lower firebox about twice as big as it is now. Do this now! If you wait until after you run wires through it, it will be virtually impossible.
Use one of the connectors from the printed circuit board removed from the tender to connect to the rear light on the tender.
![]()
REINSTALLING THE FIREBOX
Before reinstalling the firebox, make sure you have all your wires! They are:
2-cab light.
2-front headlight.
2-front truck wires.
2-smoke generator.
2-synchronized firebox light wires.
Now reinstall the firebox before you forget how it goes back together. Snake your sound sync wires back through. Reattach the sound sync wires to the pistons and reattach the pistons to locomotive.
![]()
WIRING UP TRACK POWER AND MOTORS
Note: Bachmann has changed the design of their trucks for the better. These instructions may no longer be useful.
Remove the 8 screw that hold the bottom cover onto the front truck. Remove the 2 screws that hold the truck onto the frame. These screws are deeply recessed on either side of the motor through the square opennings.
Remove the center pivot screw for the truck. The wire pathway to the boiler will now be exposed.
Here you have a choice of using the existing contacts for conducting power or running new wires of your own. If using the existing contacts, run 2 wires. If you would prefer to have no contacts that might get dirty over time, run 4 wires.
Ideally, your wires should be gray, orange, black, and red. If you choose to use all the same color, say black, be SURE you will have absolutely no doubt which wire is which. A mistake could burn up BOTH decoders!
I ran 4 new wires. I pulled the 2 existing wires into the boiler. Pull the ends out through the sand dome. Do not pull them back through the firebox yet. You will use them to help the new wires through in a few minutes.
You may also opt to run heavier wires to the contacts provided by Bachmann. They are adequately heavy to carry DCC currents.
Enlarge the slots in the top of the truck assembly so the wires don't bind.
You will find that the tabs holding the blue motor wires to the bottom of the truck simply lift straight up. Unsolder the tabs.
Snake the 4 wires to either side of the motor. Do not snake them through the gear train areas! Yes, it will be somewhat difficult snaking these wires through and attaching them. There is something to be said for the contacts at the top of the truck we are bypassing!
Now, while maintaining your sanity, you must snake the 4 wires through the bottom of the firebox. Seriously, it is much easier than it looks. Here's the trick: Remove the wires from the wipers no longer being used on the front truck. Using electrical tape, tape one of these wires to the group of 4 you are about to pull through. Be pushing the group of 4 while pulling the wire from the firebox. This works great. I tried snaking the group of 4 without the aid of this pull wire and got nowhere.
Be sure you help push the 4 wires while pulling on the wire in the firebox. Electrical tape isn't known for its super holding strength. If you want some insurance, use duct tape.
Leave the other wire in the boiler under the sand dome. You may need to do this again some day for some other reason.
Go ahead and screw the front truck back on the locomotive. Be sure you have it on correctly. You will notice that it and the truck are keyed.
You're on a roll. Go ahead and run the wires for the rear truck.
Two of the wires can stop in the tender. You will be splicing in the sound unit here before feeding the power to the firebox. The other 2 need to go straight to the firebox. They will ultimately power the rear motor. Just be sure that of the 2 wires you leave in the tender, one is on each side of the motor in the rear truck.
Time to start hooking things up!
Hooking Up the Front Truck Power Pick Up:
In the front truck, pick a wire on the right (engineer's) side, and solder it to one of brass straps that carries the power up the brass straps and to the wipers on the top of the truck. Remember, you have to put the cover plate on. So do any of the following:
1. Solder the wire to the strap being careful not to get too much solder on it or else you may have trouble getting the cover back on.
2. Solder the wire under the strap. Much easier said then done.
3. Try to remove the strips running up the side of the truck.
4. And of course, you can simply solder to the wires that the motor wires were attached to.
Stop! Don't solder any more wires on yet! If you aren't an electrical wiz, you could get yourself into trouble. You will want to follow my lead exactly. Anyone who thinksthey will be able to figure which wire is going to which wire on the motors may find yourself mistaken. So take your time.
Use an ohm meter between the wire you just soldered on and the wires in your firebox. Of the cluster of 6 holes in the circuit board, solder it in a hole that is in the second row - the row not nearest the edge of the board.
We will now begin hooking the Digitrax decoder:
Solder the large red Digitrax decoder wire into the same second row as you did above.
Solder the large black Digitrax decoder wire into the first row. Use the other extra pad.
Using your ohm meter again, find a wire in the front truck that is on the left side. Attach it to the power pick up tab as you did previosly. Attach that wire to the hole first row (nearest the edge) of the firebox circuit board.
Hooking the Rear Wheel Power Pick Up:
Using your now trusty ohm meter, find a wire on the right side rear truck. This wire should be one that stops in the tender. Solder it to the tab for the right power pick up. Attach, but do not solder, the other end in the tender to the red lead on the Soundtraxx decoder.
Solder a piece of wire to the last remaining second row hole in the firebox circuit board. Run it into the tender.
Cut off either one of the black wires from the tender circuit board that are opposite the yellow wires. These black wires are your chuff sync wires. Twist it with the wire you just ran from the firebox.
Slide a piece of heatshrink tubing over this pair and twist it's ends with the pair of twisted wires (the rear truck right side power pick up and red Soundtraxx pair) you ran a few minutes ago. Solder the 4 wires together and shrink the tubing.
Solder a wire in the last hole of the first row of the circuit board. Run this wire to the tender. Slip on a piece of heat shrink tubing so you don't forget it. Leave this wire be for a moment.
Attach a wire to the power pick up tab on the left side of the rear truck.
Use an ohm meter to locate it in the tender. Twist it together with the black wire from the Soundtraxx decoder.
Now attach the wire we sat aside a few minutes ago. Solder the three wires together and shrink the tubing.
You now have power coming from all your wheels and powering your decoders.
Hooking Up the Drive Motors:
Using your trusty ohm meter, find the wire you ran through the front truck for the right side motor lead. Twist it around the fat gray lead from the Digitrax decoder. Solder the truck end to the right motor lead.
It is extremely important that you do a good job of soldering here. Even more so, make sure you heat shrink has sufficent excess to ensure the wire ends never can get exposed after you shrink the tubing.
You will be tucking this wire into the truck. There are no moving parts where you will tuck this wire. However, should the wire become exposed and touch the power pick up tabs nearby, you WILL fry your decoder. (Should you ever fry any Digitrax decoder, their repair costs are reasonable. I had a bulb contact twist and touch the locomotive frame. So I found out what they charge the hard way!)
But why find out what a repair job costs? Shrink that tubing and make sure it is on securely. Be sure to leave AT LEAST 1/4" (6mm) of tubing past the end of the wire end BEFORE you shirnk it. You will find that as the tubing shrinks, it get's closer to the end of the wire. If you had cut it too short, the wire might have been exposed.
Then tuck the tubing down alongside the motor. I don't mean to scare anyone. I just want you to be careful. As further insurance, tuck wire in with wire tip AWAY from metal tab.
This should start sounding routine. Use your meter to find the right rear motor lead. Join it with the twisted pair from the right front truck and the gray Digitrax decoder lead. Solder them together and put some heat shrink on them. Solder the motor lead to the right rear motor lead wire.
Ohm meter to left front motor lead. Twist with the fat orange Digitraxx decoder wire. Solder wire to left motor lead.
Ohm meter to left rear motor lead. Twist with wire from front left and orange lead. Solder the twisted wires and shrink some tubing onto the. Solder the wire to the left rear motor lead and shrink on some tubing.
Testing Motor Operation:
This is a two person job. One to operate the throttle and one to hold wires to the wheels. With the locomotive laying on it's side and with the cylider side up, uncouple the linkages to the cylinders if they are still attached. This will allow you to see that both motors are working.
Before you test the motors and put the trucks back together, now is a good time to lubricate your locomotive. Also use the conductive lubricant, like Conductalube.
Do you need the conductive lubricant? I found that I couldn't get one of the wheels to power the locomotive until I put this stuff on. It works!
Hold wires from your DCC system to any pair of wheels and operate the throttle. Make sure both trucks are turning and in the right direction - that is, if your thottle is set to forward, the locomotive wheels should be turning to make it go forward. If you have layed the engine as I suggested, the tender is on your left. For forward, the wheels will be turning clockwise.
If not, you may have the orange and gray wires from the Digitrax decoder hooked up backwards.
SOUND & SPEAKER HOOKUP
The Soundtraxx decoder has two purple wires. Look at the wiring diagram that comes with it. Pick the wire that goes to their terminal #10. Solder it to the negative terminal of your speaker. If your speaker doesn't have a negative terminal, don't worry about it. Just pick one of the speaker terminals.
Don't be fooled by what you see in the diagram. It shows that the wire next to terminal #10 is purple. Looking at the decoder, you will see that it is not. Look at the diagram again. The second purple wire is on terminal #12. The wire next to #10 is #11 which shows a brown wire. So everything is as it should be.
Hook up the second purple wire to the + terminal off the capacitor - that loose gizmo that came with your Soundtraxx decoder. Your capacitor may not have a lead that is marked +. In this case, the + lead is the one that IS NOT marked -.
Attach the - lead of the capacitor to the + terminal of your speaker. Yes, you read that right. If your speaker doesn't have markings, just hook the - lead of the capacitor to the other speaker terminal.
With your Shay half apart, trying it out might require someone hold wires to the wheels while you operate the throttle. If you have alligator clips, you can clip to the wheels. This is worth doing. I'm doing it as I write. It is far better to find a mistake now than to hook up more black wires only to find several hundred dollars and hours later, nothing works.
First, clip off any exposed wire ends on either of the decoders. This will ensure you don't short anything out during the speaker test.
Hook up your DCC system to the rear truck. You should have sound.
Now take the power lead from left rear wheels and attach it to the left front wheels. Sound should resume.
Lastly, move the power lead from the right rear to the right front. You should get sound. All is well!
![]()
CHUFF SYNC
You should have already hooked up one wire from the chuff sync contacts earlier. All you have to do is hook the second wire from the chuff contacts to the CORRECT brown wire of the Soundtaxx decoder.
CAB LIGHT
Note: The simplified version does not use the voltage regulator board.
Can you use the soundtraxx rear taillight?
Yes, but you will still need the regulated voltage output.
BTW: Electrical contacts on cab roof may get dirty and make poor contact. If the cab light ever fails to work well, remove the cab roof and clean the contacts on the roof and on the top of the front cab wall.
Track voltage must be high enough forBachmann's flickering firebox to work. However, if too high, the cab light will shut down. Remove or cut a lead to the 1.8k ohm resistor labelled R9 on the Bachmann main circuit board.
FULL FEATURED VERSION:
SMOKE
Attach red smoke generator wires to orange and gray wires from Soundtraxx decoder.
PUTTING THE MODEL BACK TOGETHER
Tie wrap the wires to the speaker frame.
Run the fire box wires around the circuit board, not through the holes to hold on the bottom. Tape them to the bottom. Remove excess wiring.
Put bottom coal load on. Slide on coal door, slide, whatever that thing is. (If you know, please tell me.) Reattach top coal load. Use a few screws to hold the top coal load in.
In case you haven't noticed yet, getting the tender on is a bit tricky since the wires keep getting in the way. So I've indicated three places to put tie wraps to make the job much easier. Two of them attach to the speaker frame. The third just holds the wires into a "U" so that it tucks into the left fronted corner of the tender.
If the tender still won't sit flat on the deck of the locomotive, you may be having trouble with a few of the wires exiting under the rear truck.
Don't forget to connect the tender light.
Put screws on right side. Frame on left makes doing so on that side difficult.
Before reattaching front truck, reattach grab rail. Put sand dome back on locomotive before attempting to reattach grab rail.
Put whistle back on locomotive. Put windows back in cab and then replace roof.
Now that you are all done, you should have a pile of extra screws that don't go anywhere. Either you don't really need them, or they multiplied when you placed them together!
Should you enlarge the speaker "air" holes? For one thing, the holes are about the diameter of the cone on the 4" speaker. The cone is the important sound generator part of a speaker. The speaker air holes, usually referred to as the grill, also serve to protect the speaker from damage - like screwdrivers that slip! So I left the holes alone.
CV SETTINGS YOU MAY WANT TO TRY
Though not required reading, you may want to read the section on Hexadecimal Demystified.
This is what I settled on for my Shayfor the time being. I expect will continue to experiment with it for some time to come.
| CV: | Value: | Description/Details: |
| Short Address - Have them program this. | ||
| Vstart - Adjust this value up for the until you get the desired smoke effect you are after. | ||
| Accel | ||
| Brake. If you are used to momentum, leave this 0 until you are. | ||
02h |
Configuration 00h Dir 02h 28/128 & FL control. |
|
| FL(F0) forward headlight control. 8xh Automatic dynamo control. |
||
| FL(F0) Reverse headlight control. | ||
| F1 controls Firebox. | ||
| F2 Whistle. | ||
| F3 Bell. | ||
| F4 Blow down. | ||
| F5 Bell (ring, and if installed, swing.) | ||
| F6 Dynamo. Use 20h to control coupler clank instead. |
||
| F7 Mute. Note: F7 is a little difficult to use on a Digitrax throttle
because of finger positions. Try it! No big deal, really. Just use F7 for functions you will use less often. Use 04h if F7 control of the coupler clank is desired. |
||
| F8 Mute | ||
| F1 Firebox flicker (not adjustable) 02h no sync w/Fireman Fred. |
||
| 00-0F Volume | ||
| Background Effects. 1011 1110 F3 Blowdown, boiler pop valve,
pneumatic grease gun, Fred, blower, air pump, fast clock effects. x1h Real, not scaled, time for random effects. (x means don't care. Whatever is there is not relevent to the current instruction.) x2h Air pump. x4h Blower. x8h Fireman Fred. 1xh Pneumatic grease gun. 2xh Boiler pop off. 4xh Auto blowdown. Otherwise F3. 8xh Enable selected background effects. |
||
| Foreground Effects. 0110 Single air pump, cam sync, DDE,
Shay. x0h Shay and 2 cylinder locos=0; Articulated locos=1. x1h Dynamic Digital Exhaust. x4h Cam chuff sync. x8h Dual air pump. 0xh - F0h Fast - slow bell. |
||
| Wait for addressed packet before turning on sound. 00h Sound starts up after power on. |
||
| 00h-3Fh Exhaust tone control. | ||
| 00h-FFh non-DDE exhaust volume control. |
01 |
05 |
Short Address (2 digit) |
29 |
02h |
Use short address 28/128, Analog |
49 |
00h |
Normal Forward Headlight |
50 |
00h |
Normal Reverse Headlight |
51 |
00h |
Cab Light |
52 |
A6h |
Flickering Firebox |
62 |
04h |
0x-Fx Keep-alive/Baseline voltage for flickering
firebox (Digitrax only!) x0-xF Flicker rate. 0 is fast. F is slow |
![]()
So not only was the terrain too torturous for a standard rod driven locomotive, there was no nicely graded and ballasted roadbed and trackwork.
The first order of business is to get rid of the rigidly mounted drivers of a standard rod driven locomotive. Compared to a rod drive locomotive, gear driven locomotives can turn on a dime. You can readily take advantage of this in your garden where there may not be enough room fo large radii.
The spline and universal joints of the powertrain allows every wheel to help move the locomotive through the rugged terrain. You can take advantage of this by employing steeper grades where you don't have room for a more gradual rise. Where a typical locomotive has a limit of about 4% grade, a Shay can climb 10% up to 14%.
There's no place for speed in rugged mountains with heavily log laden cars. So the gearing and small drive wheels trades the speed of a rod driven locomotive for tremendous torque. It can get up to any speed it wants to in relatively little time. Of course that speed is only about 4 to 12 mph!
So the long drawn out chuff of a rod driven locomotive is replaced by rapid staccoto bursts of a steam and a flurry of activity by the pistons as this locomotive goes nowhere fast. As you lounge and enjoy a leisurely time in your garden, let your Shay do likewise and run it slow. While the train progesses at a snails pace, you will be rewarded by the sights and sounds of busy pistons.
A rod driven locomotive has the pistons on each side for balance. While the Shay needs to be balanced, too, putting a drive train like it has on both sides would do little except complicate things greatly. So the pistons are on the right side and the boiler is offset to the left to provide balance.
Having no driving mechanisms on the left makes it effortless to get under the locomotive to do servicing. Also notice that there is almost nothing underneath to service. Try to get under a rod driven locomotive without a pit! Lastly, all the driving mechanisms are convienently exposed on the right side. None of this is any accident. What if it breaks down up on a mountainside? Even back at the base camp, there were no lavish engine servicing facilities - after all, it was a temporary location appropriately called a camp.
It was undesirable to waste the time and effort to put up temporary water tanks on these precarious mountainsides. Besides, just think of moving a large wooden tank and expecting it told water after you were through! Hence, the Shay is equipted with a steam powered siphon to suck water out a mountain stream. That's represented by the piece of modern day tubing Bachmann supplied with the Shay.
You should see this thing work! It's been a few years since I've been to Cass. Hopefully, they still have the old tank car they cut a big hole in and sank it into a small mountain creek. They drop the siphon hose into the flooded tank car and proceed to suck it empty in the next few minutes. I suspect small mountain streams were dammed up with tree branches they had no intention of taking to the saw mill.
You have an interesting challenge in laying your trackwork. You might think that you have a good opportunity to lay sloppy looking trackwork. After all, that would be prototypical! But your trackwork will probably be down many more years than the prototype. So your challenge is to lay it down well while at the same make it look bad.
It will be quite some time before I get to the logging section of my garden railway. (Turning a flat Texas landscape into mountains will take about 70 tons of dirt.) It would seem to me that you should put down your subroadbed using your favorite method. Then lay landscape fabric on top of it. Cover it with some dirt and sparse ballast.
Additionally, you will need to anchor the track. Probably not to well though. Go ahead and let changing temperatures wreak a little havoc with it to make it look more prototypical. Anchor it just enough to keep it in place over your hidden subroadbed. Let me know what you think.
Shays came in both narrow gauge and standard gauge, had two or three cylinders, and had typically two or three trucks. In the case of the third truck, the tender portion was moved to this truck allowing both the tender and the boiler to be bigger.
Some US locations where operating Shays can be found:
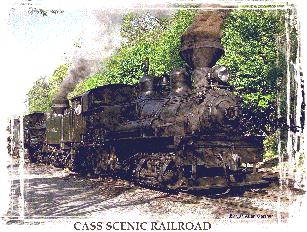
Cass Scenic Railroad, Cass, WVa - The place to go for geared locomotives in the eastern US. About 90 minutes off the Interstate from Roanoke, Va. Ask about the railfan weekends. 1-800-CALL WVA. OCCASSIONALLY a washout in early spring affects their operating schedule. This is a real mountain logging railroad! You might want give them a call to be sure everything is fine. Stop by in Roanoke to see N&W 611 at the Virgina Transportation Museum.
North Carolina Transportation Mueseum at Historic Spencer Shops, Spencer, NC. See their newly restored roundhouse. Call to find out when the Shay is being run.
Big Trees and Roaring Camp, Santa Cruz, CA. Several Shays and occassionally a Heisler through a redwood forest. Has a operating steam donkey powered sawmill and a few other things for the family.
Yosemite Sugarpine Railroad, SSW of Yoesemite National Park, CA. A former logging railroad on the outskirts of this great park.
Georgetown Loop, CO. You know about the famous loop. They have Shays, too!
![]()
Older Shay Owners: Is Your Bachmann Shay Falling Apart?
Note: Since the introduction of the Shay, Bachmann has changed the design of their trucks several times. I just installed (May 2005) some of the new cast trucks introduced earlier this year. So far, so good. If you buy a new Shay, hopefully you will not have problems. I don't recommend buying a Shay on eBay. If you buy one of the older Shays, you may be buying yourself some problems. If you need to buy the new trucks, they are about $100.
Here is what I had written pertaining to the older Shays:
When Bachmann started producing their Spectrum line of locomotives, I thought they had finally come to the realization that if they wanted to be a successful model train manufacturer, they needed to up their quality of appearance and manufacturing. They may have come to the realization that they needed to up their quality, but I'm not sure if they have figured out how to do it. Unfortunately, every locomotive they make it seems has some major problem, usually electrical. To their credit, if you call up and complain about one of their infamous quality problems, they will act promptly to send you new parts. They will deny they have a quality problem. You will think you are the only one who has the problem. I have come to the realization that LGB's aren't so overpriced overall. They run and run!
Ask around and you will find you are not the only one who has a Shay that runs terribly and/or your trucks are falling apart. You can send the locomotive to them and they will fix it or they will send you new parts. Your choice. Evidently there was something wrong with the plastic used to make the truck housing and gears. If your truck hasn't started falling apart on you and it is running poorly, if at all, openning the truck will reveal broken gears. Of course, if your Shay is running fine, you are fortunate to have one that was made after the problem was identified.
Other Bachmann problems: 10-wheeler - Drive mechanism won't stay meshed. Contact Barry's Big Trains for a well built drive mechanism. Climax - Chuff sync wired in series making it impossible to use the built in chuff sync contacts. If wired in parallel, chuff is not properly sync'ed. American 4-4-0 - wired wrong, runs backwards. Fortunately, easily remedied when installing DCC.
Copyright by Allan Gartner 1996 - 2006 © All rights reserved. You may print this for your own, personal, non-commercial use. Non-commercial, non-personal reproduction may be requested by visiting www.WiringForDCC.com/writeme.htm . All users, commercial and non-commercial, may link only to this site at www.WiringForDCC.com. Thanks to all who contribute to this site and the Q&A forum! |
 Remove the
tender: Be careful, their is a weight inside that will fall out
and find your toes. Laugh, but it's conceivable it could break
them. Or worse, fall on your Shay and break it.
Remove the
tender: Be careful, their is a weight inside that will fall out
and find your toes. Laugh, but it's conceivable it could break
them. Or worse, fall on your Shay and break it.